In today's digital age, securing user authentication on websites is paramount. With cyber threats looming large, businesses need robust solutions to protect sensitive user data. HashiCorp Vault emerges as a potent tool in this realm, offering a secure and scalable platform for managing secrets and protecting cryptographic assets. In this blog, we'll delve into the significance of user authentication and explore how HashiCorp Vault can fortify your website's security infrastructure.
Understanding the Importance of User Authentication User authentication serves as the first line of defense against unauthorized access to web resources. Whether it's accessing confidential information, making transactions, or simply logging into an account, users entrust websites with their credentials. Consequently, any compromise in authentication mechanisms can lead to severe repercussions, including data breaches, financial losses, and damage to reputation.
Introducing HashiCorp Vault HashiCorp Vault stands out as a comprehensive solution for secret management and data protection. It offers a centralized repository for securely storing and accessing sensitive information such as API keys, passwords, and encryption keys. Vault employs robust encryption and access control mechanisms to safeguard secrets from unauthorized access, ensuring compliance with stringent security standards.
Implementing Authentication with Vault
Secure Secret Storage: Configure Vault to securely store user authentication secrets using its Key-Value and transit secrets engines. Employ encryption to safeguard data in transit and at rest.
Dynamic Secrets: Leverage Vault's dynamic secrets to generate short-lived, dynamically created credentials for user authentication. Implement RBAC to enforce granular access control.
Tokenization and Authentication Methods: Utilize Vault's authentication methods, like LDAP, OAuth, or JWT, to authenticate users against external identity providers. Integrate MFA for added security.
Auditing and Monitoring: Enable Vault's auditing and monitoring features to track authentication activities. Log authentication requests and access attempts for proactive threat detection.
High Availability and Disaster Recovery: Ensure Vault's high availability across multiple data centers or cloud regions. Implement automated backups and disaster recovery procedures for uninterrupted access.
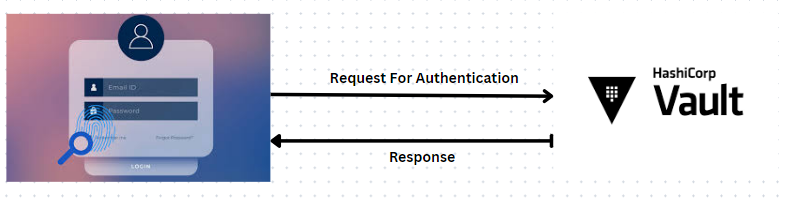
In this blog, we'll explore the process of authenticating users from a website to HashiCorp Vault. Securing user authentication is crucial for safeguarding sensitive data, and HashiCorp Vault offers a robust solution for managing secrets securely. We'll delve into the significance of user authentication and how implementing HashiCorp Vault can bolster your website's security infrastructure.
Install Vault On Your Server
root@master:~# wget -O- https://apt.releases.hashicorp.com/gpg | sudo gpg --dearmor -o /usr/share/keyrings/hashicorp-archive-keyring.gpg
echo "deb [signed-by=/usr/share/keyrings/hashicorp-archive-keyring.gpg] https://apt.releases.hashicorp.com $(lsb_release -cs) main" | sudo tee /etc/apt/sources.list.d/hashicorp.list
sudo apt update && sudo apt install vault
--2024-04-19 12:52:47--  https://apt.releases.hashicorp.com/gpg
Resolving apt.releases.hashicorp.com (apt.releases.hashicorp.com)... 18.164.144.19, 18.164.144.67, 18.164.144.105, ...
Connecting to apt.releases.hashicorp.com (apt.releases.hashicorp.com)|18.164.144.19|:443... connected.
HTTP request sent, awaiting response... 200 OK
Length: 3980 (3.9K) [binary/octet-stream]
Saving to: ‘STDOUT’

-                                                           100%[========================================================================================================================================>]   3.89K

2024-04-19 12:52:52 (1.54 MB/s) - written to stdout [3980/3980]

deb [signed-by=/usr/share/keyrings/hashicorp-archive-keyring.gpg] https://apt.releases.hashicorp.com mantic main
Get:1 https://download.docker.com/linux/ubuntu mantic InRelease [48.8 kB]
Get:2 https://apt.releases.hashicorp.com mantic InRelease [12.9 kB]
Ign:4 https://aquasecurity.github.io/trivy-repo/deb mantic InRelease
Get:5 https://download.docker.com/linux/ubuntu mantic/stable amd64 Packages [11.5 kB]
Start Vault Server
root@master:~# vault server -dev -dev-listen-address=0.0.0.0:8200 &
[1] 7382
root@master:~# ==> Vault server configuration:

             Api Address: http://0.0.0.0:8200
                     Cgo: disabled
         Cluster Address: https://0.0.0.0:8201
              Listener 1: tcp (addr: "0.0.0.0:8200", cluster address: "0.0.0.0:8201", max_request_duration: "1m30s", max_request_size: "33554432", tls: "disabled")
               Log Level: info
                   Mlock: supported: true, enabled: false
                 Storage: inmem
                 Version: Vault v1.2.3

WARNING! dev mode is enabled! In this mode, Vault runs entirely in-memory
and starts unsealed with a single unseal key. The root token is already
authenticated to the CLI, so you can immediately begin using Vault.

You may need to set the following environment variable:

    $ export VAULT_ADDR='http://0.0.0.0:8200'

The unseal key and root token are displayed below in case you want to
seal/unseal the Vault or re-authenticate.

Unseal Key: xxxxxxxxxxxxxxxxxxxxxxxxxxxxxxxxx
Root Token: xxxxxxxxxxxxxxxxxxxxxxxxxxxxxxx

Development mode should NOT be used in production installations!
Login to Vault
root@master:~# export VAULT_ADDR='http://0.0.0.0:8200'
root@master:~# vault login
Token (will be hidden):
WARNING! The VAULT_TOKEN environment variable is set! This takes precedence
over the value set by this command. To use the value set by this command,
unset the VAULT_TOKEN environment variable or set it to the token displayed
below.

Success! You are now authenticated. The token information displayed below
is already stored in the token helper. You do NOT need to run "vault login"
again. Future Vault requests will automatically use this token.

Key                  Value
---                  -----
token                xxxxxxxxxxxxxxxxxxxxxxxxx
token_accessor       jXl034q6KU0r4fuWQR32MEcu
token_duration       ∞
token_renewable      false
token_policies       ["root"]
identity_policies    []
policies             ["root"]
Create Secret
root@master:~# vault secrets enable -path=web-auth kv
2024-04-19T14:17:44.069+0530 [INFO]  core: successful mount: namespace= path=web-auth/ type=kv
Success! Enabled the kv secrets engine at: web-auth/
Create Password for User
root@master:~# echo "amit@test.com" | sha256sum -
Push The User and Cred in the Vault and Verify
root@master:~# curl -H "X-Vault-Token: xxxxxxxxxxxxxxx" --request POST -d '{"amit@test.com":"f9ac24d8c6d410619017ccca98ca4544b05a74ef48c29335a958ad25dd642ad6"}' http://192.168.0.114:8200/v1/web-auth/creds

root@master:~# curl -H "X-Vault-Token: xxxxxxxxxxxxxxxxxxx" http://192.168.0.114:8200/v1/web-auth/creds | jq
{
  "request_id": "ff9d26fc-6abd-b585-b908-2535c4525c1c",
  "lease_id": "",
  "renewable": false,
  "lease_duration": 2764800,
  "data": {
    "amit@test.com": "f9ac24d8c6d410619017ccca98ca4544b05a74ef48c29335a958ad25dd642ad6"
  },
  "wrap_info": null,
  "warnings": null,
  "auth": null
}
 Create and apply policy
root@master:~# cat policy.hcl
path "web-auth/creds" {
   capabilities = ["read"]
}

root@master:~# vault policy write web-policy policy.hcl
Success! Uploaded policy: web-policy
Create Token against policy and use token to access credentials
root@master:~# vault token create -policy="web-policy" -format=json | jq -r ".auth.client_token" > read_token
root@master:~# cat read_token
s.QGR5JsrF7toZcOGj4rKClcvT

root@master:~# curl -H "X-Vault-Token: s.QGR5JsrF7toZcOGj4rKClcvT" http://192.168.0.114:8200/v1/web-auth/creds | jq
{
  "request_id": "4761279f-d3e8-3451-64d3-b17e5b5b8be7",
  "lease_id": "",
  "renewable": false,
  "lease_duration": 2764800,
  "data": {
    "amit@test.com": "f9ac24d8c6d410619017ccca98ca4544b05a74ef48c29335a958ad25dd642ad6"
  },
  "wrap_info": null,
  "warnings": null,
  "auth": null
}
Now Lets Create Sample Web Application Using Flask
root@master:~# pip install flask
root@master:~# mkdir -p website/templates;cd website
root@master:~/website# cat view.py
from flask import Flask, render_template, request, jsonify
import hashlib
import requests
import json

app = Flask(__name__)

def get_hashed_vault_creds():
    url = "http://0.0.0.0:8200/v1/web-auth/creds"
    headers = { 'X-Vault-Token' : 's.QGR5JsrF7toZcOGj4rKClcvT' }

    response = requests.get(url, headers=headers)
    my_json = response.json()
    creds = []
    for key, value in my_json['data'].items():
        creds.append(key)
        creds.append(value)
    return creds

def acg_login_view(email, password):
    print("login view called")
    credsHash = hashlib.sha256(password.encode()+ b'\n').hexdigest()
    vault_hash = get_hashed_vault_creds()[1]
    if vault_hash == credsHash:
        return True
    else:
        return False

@app.route('/', methods=['GET', 'POST'])
def login():
    if request.method == 'POST':
        email = request.form['email']
        password = request.form['password']
        if acg_login_view(email, password):
            return jsonify({'message': 'Login successful'}), 200
        else:
            return jsonify({'message': 'Login failed'}), 401

    return render_template('login.html')

if __name__ == '__main__':
    app.run(debug=True)
Create Html Page
root@master:~/website# cat templates/login.html
from flask import Flask, render_template, request, jsonify
import hashlib
import requests
import json

app = Flask(__name__)

def get_hashed_vault_creds():
    url = "http://0.0.0.0:8200/v1/web-auth/creds"
    headers = { 'X-Vault-Token' : 's.QGR5JsrF7toZcOGj4rKClcvT' }

    response = requests.get(url, headers=headers)
    my_json = response.json()
    creds = []
    for key, value in my_json['data'].items():
        creds.append(key)
        creds.append(value)
    return creds

def acg_login_view(email, password):
    print("login view called")
    credsHash = hashlib.sha256(password.encode()+ b'\n').hexdigest()
    vault_hash = get_hashed_vault_creds()[1]
    if vault_hash == credsHash:
        return True
    else:
        return False

@app.route('/', methods=['GET', 'POST'])
def login():
    if request.method == 'POST':
        email = request.form['email']
        password = request.form['password']
        if acg_login_view(email, password):
            return jsonify({'message': 'Login successful'}), 200
        else:
            return jsonify({'message': 'Login failed'}), 401

    return render_template('login.html')

if __name__ == '__main__':
    app.run(debug=True)

root@master:~/website# cat templates/login.html
<!DOCTYPE html>
<html lang="en">
<head>
    <meta charset="UTF-8">
    <meta name="viewport" content="width=device-width, initial-scale=1.0">
    <title>Login</title>
    <style>
        body {
            font-family: Arial, sans-serif;
            background-color: #f7f7f7;
            margin: 0;
            padding: 0;
            display: flex;
            justify-content: center;
            align-items: center;
            height: 100vh;
        }

        .login-container {
            background-color: #fff;
            padding: 20px;
            border-radius: 10px;
            box-shadow: 0 0 10px rgba(0, 0, 0, 0.1);
            width: 300px;
        }

        .login-container h2 {
            margin-top: 0;
            text-align: center;
            color: #333;
        }

        .login-form label {
            font-weight: bold;
            color: #555;
        }

        .login-form input[type="email"],
        .login-form input[type="password"] {
            width: 100%;
            padding: 10px;
            margin-bottom: 15px;
            border: 1px solid #ccc;
            border-radius: 5px;
            box-sizing: border-box;
            font-size: 16px;
        }

        .login-form input[type="submit"] {
            width: 100%;
            padding: 10px;
            border: none;
            border-radius: 5px;
            background-color: #007bff;
            color: #fff;
            cursor: pointer;
            font-size: 16px;
            transition: background-color 0.3s ease;
        }

        .login-form input[type="submit"]:hover {
            background-color: #0056b3;
        }
    </style>
</head>
<body>
    <div class="login-container">
        <h2>Login</h2>
        <form class="login-form" method="POST">
            <label for="email">Email:</label><br>
            <input type="email" id="email" name="email" required><br><br>
            <label for="password">Password:</label><br>
            <input type="password" id="password" name="password" required><br><br>
            <input type="submit" value="Login">
        </form>
    </div>
</body>
</html>
Start the Server
root@master:~/website# flask run --host=0.0.0.0 --port=5000
 * Serving Flask app 'view.py'
 * Debug mode: off
WARNING: This is a development server. Do not use it in a production deployment. Use a production WSGI server instead.
 * Running on all addresses (0.0.0.0)
 * Running on http://127.0.0.1:5000
 * Running on http://192.168.0.114:5000
Press CTRL+C to quit
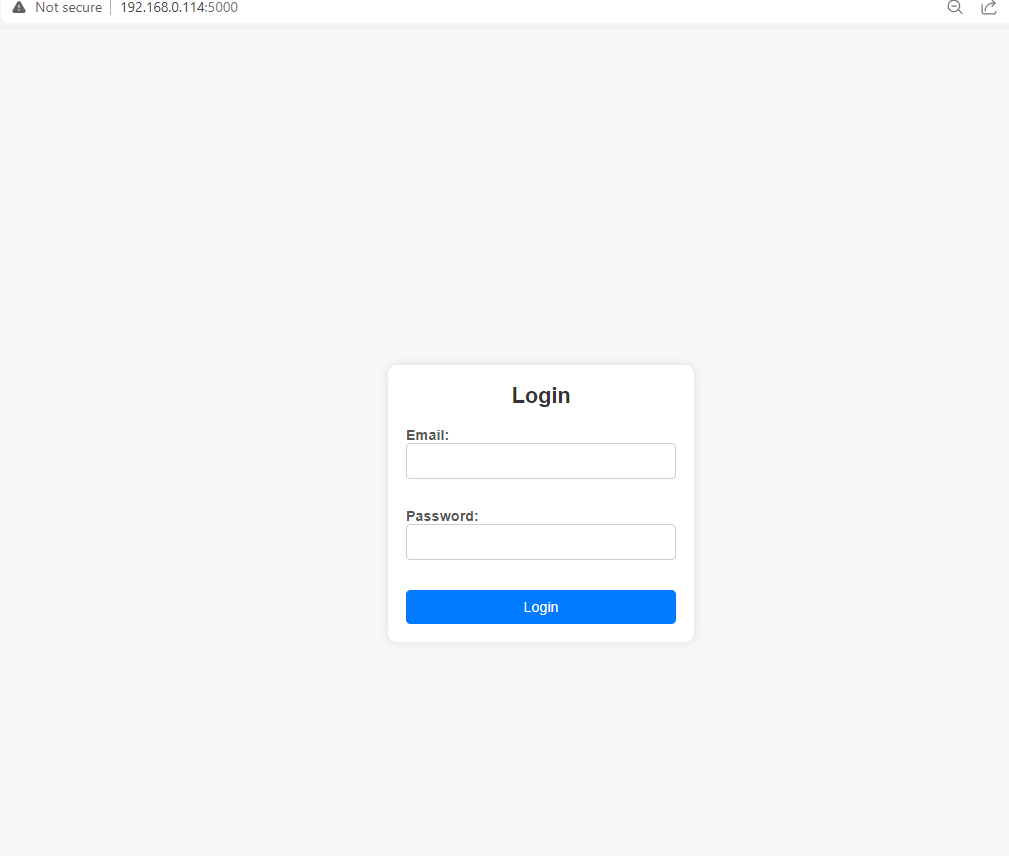
Access the Page
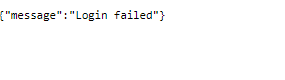
Lets Try To Login With Wrong Password

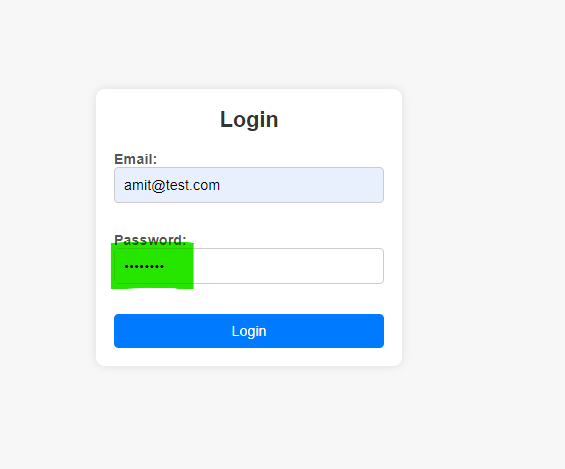
Lets Try To Login With Correct Password
Conclusion Above steps are one of the way, we can integrate Vault securely into our web service for authentication, ensuring that sensitive credentials are protected and authentication is performed reliably.